Create a Table of Contents
This tutorial describes how to create a report with a table of contents, which is automatically created based on the bookmarks existing in a report.
To insert a table of contents into a report, do the following.
-
Drop the Table Of Contents control from the Toolbox onto the Report Header Band.
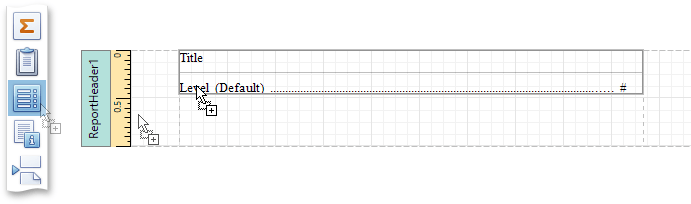
Alternatively, you can double-click the control in the Toolbox. In this case, if the report does not contain a Report Header, it will be created automatically, so that the table of contents can be added to it.
-
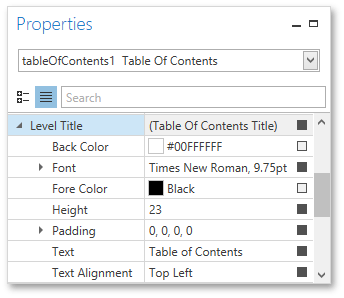
Double-click the title of the table of contents and specify its text.

-
To customize the title’s appearance, use the Level Title option’s settings available in the Properties Panel.
-
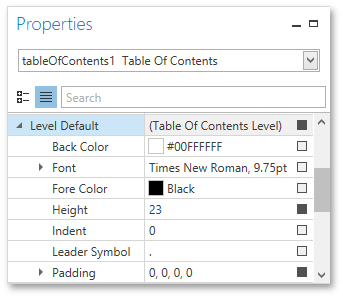
To customize the appearance of all other levels, use the Level Default option’s settings.
-
To customize a specific level individually, add a corresponding item to the Levels collection of the table of contents.
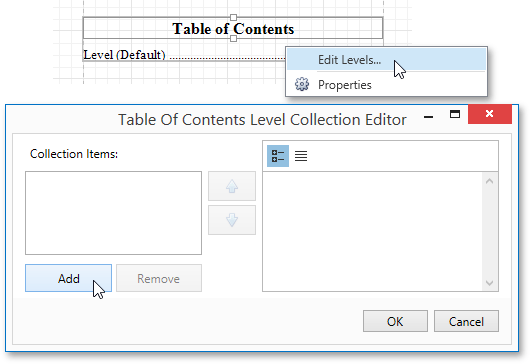
After adding a new level, you can access and customize its properties.
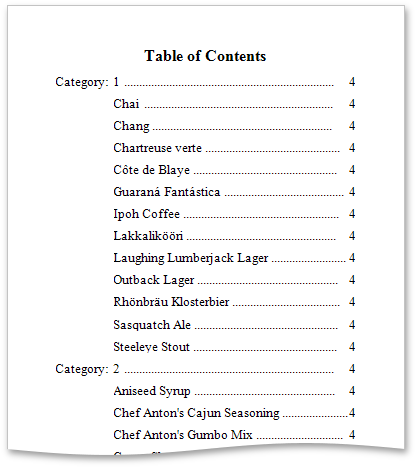
The table of contents are now ready. Switch to the Print Preview and view the result.